Speckman Honey
John's Cell 816-810-5642 or Bev's 816-589-8762 Call this number for honey/wax/pollen
Know your LOCAL Beekeeper
This is dedicated to how we are raising our queen bees.
Intro to Queen Rearing.
I got interested in raising our own queens in the late 80's, and after spending some time with a couple of package bee/queen breeders in Georgia, we started raising a portion of our own queens.
We use the "Jenter" method for raising queens, as my eye sight is not good enough to try "Grafting" the 3 day old larve needed to start with.
This system is a easy way to raise queens, and we have had great success using it.
Let me explain a little about this system and the various parts used to to produce a batch of queen cells to be placed in the starter nuc's (small version of hive).
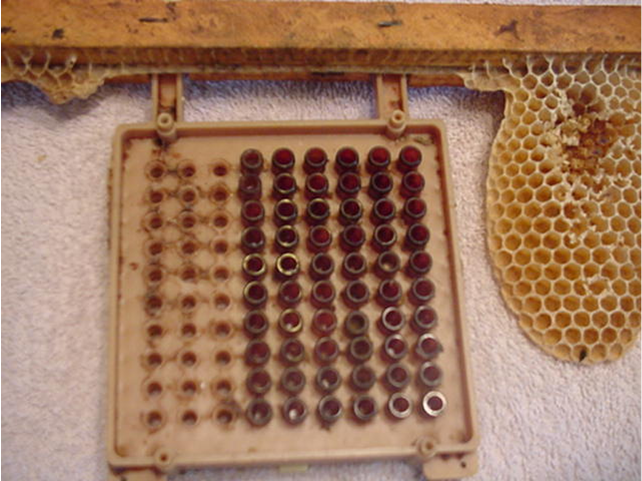
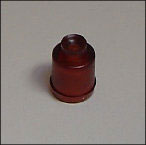
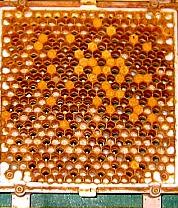
- 3 days - 3 days prior to confinement of the queen, you will want to insert a cell plug into each hole in the confinement frame, and then place the completed frame/comb into a bee hive so the bees can clean and polish the cell plugs for the queen to use.
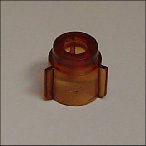
Insert all the cell plugs into the Confined Queen Lay area of Frame ..-------------------->>>>>
Insert the full confinement cage into a colony, leave for at least 24-36 hours. During this
time the bees will have time to clean/polish the cell plugs. You will want to make sure to
remove the front cover plate, this will allow the bees full access to the cell plugs so they
can do their cleaning work.
1).You need to confine your queen in the supplied frame holding the cells that she will lay her eggs that will be used to start queen cells with. This has a cover that is placed of the area to keep the queen from leaving this area, she will lay eggs in each cell, that way you will know the are of the larve used for the queen cells. After 24 hours, you will need to check to see if eggs are being laid in the cell plugs, if plugs have eggs, you can then release the queen back into the colony. If not, insert frame back into the colony, and recheck in 24 hrs, by the 2nd 24 period , plugs should be ready, and The queen is released and allowed to go back to laying eggs in the normal frames.
2) Prepare you cell bars, while you are waiting the minimum 3 days, for the eggs to hatch
into larve.
a. Coat your cell bars with a thin layer of beeswax
b. Push cell base into the warm beeswax
c. Add an additional coat of beeswax on the edges of the cell base, this will provide extra
strength, so they will not fall off the cell bars.
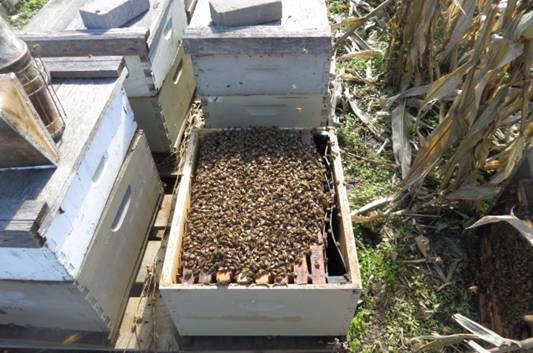
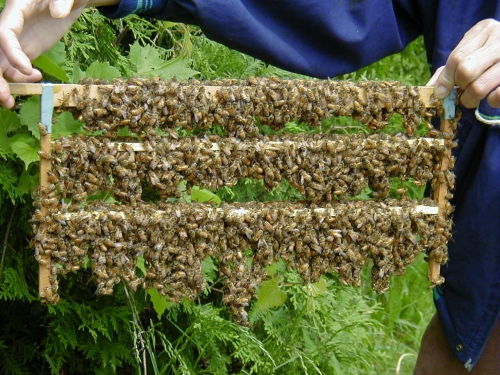
3.) You have (3) days to prepare a cell builder colony, which needs to contain alot of bees, as well as honey & pollen. We usually go to muliple colonies, and shake bees off of frames of eggs, and larve, as these are the nurse bees, and will need ALOT of these to start the queen cells when used in step # 3.
Shake or Brush bees from donor colonies. Try and use bees from frames of eggs/larvae
(Nurse Bees)
Frames of Honey & Pollen NO frames with eggs or larva. NO queen.
We add a feeder of syrup to the starter colony to make sure they are well fed.
We usually place this colony inside in a dark area, using screen on bottom & top, this helps to keep the bees calm prior to inserting the cells
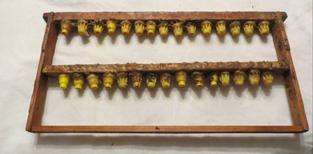
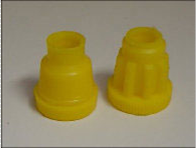
4.) After 3 days you will need to transfer each of the cell plugs from the cage to a cell cup, and a queen cell base. You will then place the cell base onto the cell bar which is attached to a standard frame.
5) Day 4 (from the date queen laid the eggs)
Transfer the cell plugs into the cup/cell base
onto the cell bar you have created. Place the
complete cell bar directly into the cell builder so the nurse bees can start making the cells.
6) The cell builder is now placed outside(if you move inside as shown in step # 3), make sure
to make sure the bees can now fly free, and gather pollen and nectar.
After the first 24-36 hours,,, the nurse bees will be busy feeding the young larvae. Do a quick
inspection of the cell builder, this will show you how sucessfull the graft was. Any of the cells
that have accepted larve for queens will have been lengthen to look like small queen cells. We make sure that there is plenty of feed on the colony, so feed if necessary. This will ensure that there is plenty of source for feeding the queen larve.
There should be nurse bees all over the accepted grafts...
We have used the cell starter as the finisher colony also, which has worked well for us.
An option would be to create a cell starter and a finisher colony. In ths fashion, the finisher box would be above a queen excluder on a queen right colony, you would want to move frame of eggs/larve and place it between frames of queen cells in the top box. This will draw nurse bees up from the botton box to feed the queens being made.


Insert the Plug into the plastic frame, wait 3 days, and place into the Cup.... Then place in Base.